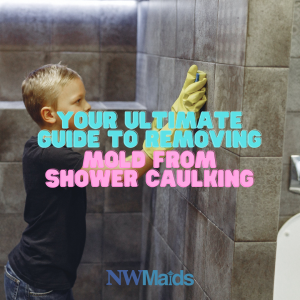
How to Clean Mold off Shower Caulk: Ultimate Guide
To clean mold off shower caulk, mix equal parts of bleach and water, apply the solution to the affected areas, scrub with a brush, and rinse thoroughly with water. Mold on shower caulk is a common problem that can be unhealthy and unsightly.
It can occur due to the damp conditions in bathrooms, allowing mold spores to grow and thrive. Fortunately, cleaning mold off shower caulk is a relatively simple task that can be done using basic household ingredients and tools. By following a few steps, you can effectively remove the mold and restore the cleanliness and freshness to your bathroom.
Read on to learn how to clean mold off shower caulk and prevent its recurrence.
Understanding Shower Caulk Mold

Credit: nwmaids.com
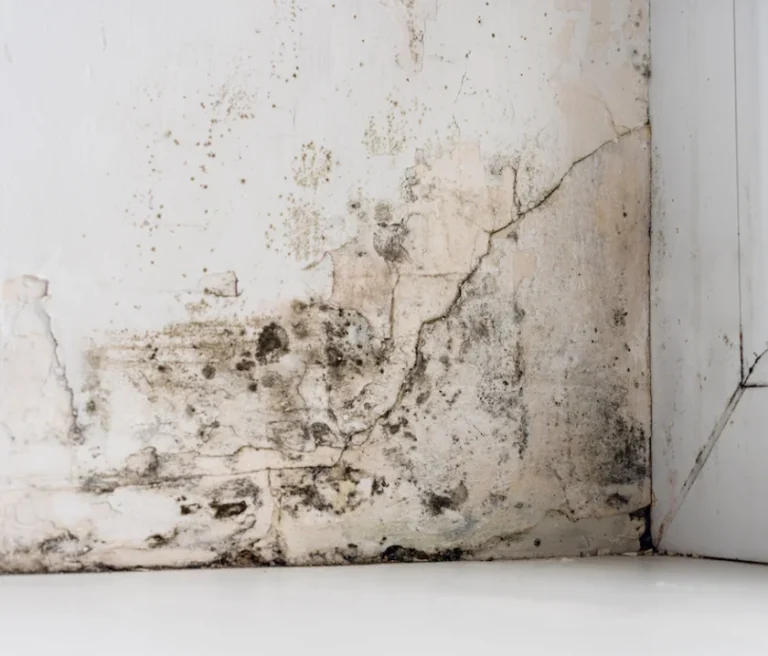
Identifying Mold On Shower Caulk
Cleaning mold off shower caulk is an essential task to maintain a clean and healthy bathroom environment. However, before you can start cleaning, it is crucial to identify the presence of mold and determine the type of mold infestation you might be dealing with. This will help you choose the right cleaning methods and ensure effective results. In this section, we will guide you on how to recognize different types of mold and the signs of mold infestation on shower caulk.
Recognizing Different Types Of Mold
Mold comes in various forms and colors, and each type may require specific cleaning methods. Here are some common types of mold that can grow on shower caulk:
- Black Mold (Stachybotrys chartarum): This type of mold is a greenish-black color and has a slimy texture. It usually thrives in damp and humid conditions, making the bathroom an ideal environment for its growth.
- Green Mold (Aspergillus): As the name suggests, this type of mold appears green in color. It can appear powdery or fluffy and is commonly found in areas with high moisture levels, like a shower stall.
- Yellow Mold (Aureobasidium): Yellow mold typically starts off as a slimy, yellowish film and may darken to a brown or black color over time. It can be commonly found on shower caulk, especially when there’s insufficient ventilation in the bathroom.
Signs Of Mold Infestation
Identifying mold infestation on shower caulk early on is crucial to prevent further growth and potential health issues. Look out for the following signs to determine if you have a mold problem in your bathroom:
- Discoloration: Mold often appears as dark spots or patches on the shower caulk, walls, or tiles. Keep an eye out for any unusual colors, such as black, green, or yellow hues.
- Musty Odor: Mold carries a distinct musty smell that can be quite noticeable in enclosed spaces, like the bathroom. If you notice an unpleasant, damp odor, it may indicate mold growth.
- Peeling or Cracked Caulk: Mold tends to thrive in areas where the caulk has deteriorated or cracked, as it provides a favorable breeding ground. Pay attention to any signs of peeling or crumbling caulk.
- Allergic Reactions: If you or your family members experience unexplained allergic symptoms such as sneezing, coughing, or skin irritations when using the bathroom, it could be due to mold presence.
By recognizing different types of mold and being aware of the signs of mold infestation on shower caulk, you can take the necessary steps to address the problem effectively. Cleaning mold promptly will not only restore the cleanliness of your bathroom but also contribute to a healthier living environment for you and your family.
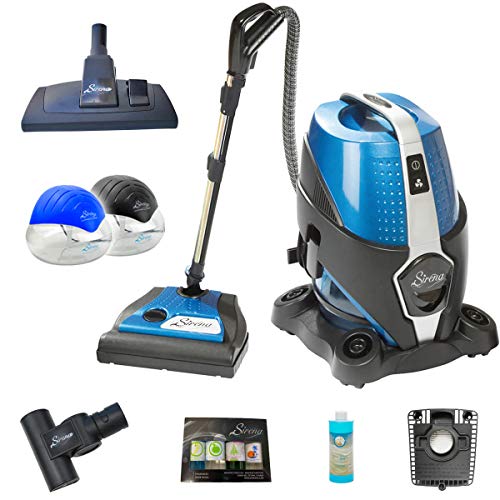
Tools And Materials For Cleaning
To effectively clean mold off shower caulk, it is important to gather the right tools and materials for the job. Having the essential cleaning tools and recommended cleaning products can make the process easier and more effective. Below, we outline the key items you will need to safely and thoroughly clean mold from shower caulk.
Essential Cleaning Tools
- Scrubbing brush
- Old toothbrush
- Microfiber cloths
- Rubber gloves
- Bucket
Recommended Cleaning Products
- Bleach: A powerful solution for killing mold and mildew
- Vinegar: Natural and effective at eliminating mold and preventing regrowth
- Baking soda: A mild abrasive that can help lift and remove mold stains
- Hydrogen peroxide: Effective at killing mold and suitable for porous surfaces
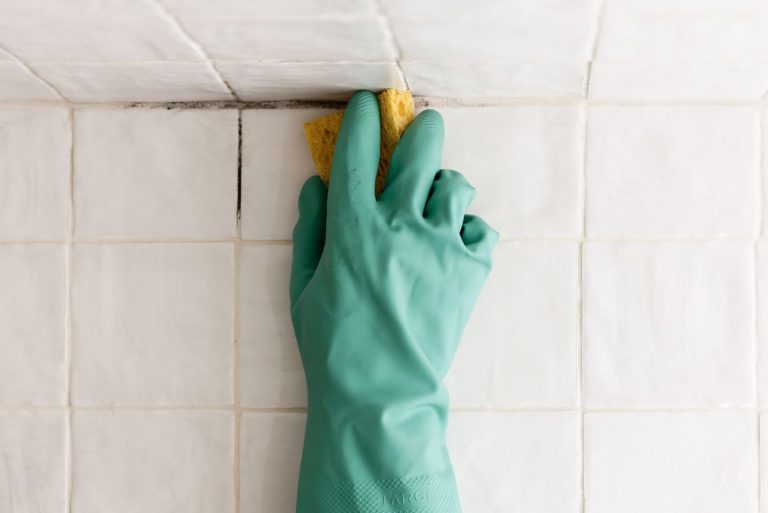
Step-by-step Cleaning Process
Step-by-Step Cleaning Process:
Preparation And Safety Measures
Mold can be harmful, so it’s important to take proper precautions before starting the cleaning process. Here are some steps you can follow to prepare and ensure your safety:
- Put on rubber gloves and safety goggles to protect your skin and eyes from the cleaning solution and mold spores.
- Open windows and turn on the bathroom ventilation fan to provide proper ventilation throughout the cleaning process.
- Ensure there is adequate lighting in the shower area so you can see all the affected areas clearly.
Cleaning Mold Off Shower Caulk
Now that you’ve taken the necessary safety measures, it’s time to clean the mold off your shower caulk. Follow these steps for an effective cleaning process:
- Create a cleaning solution by mixing equal parts of distilled white vinegar and water. Vinegar is a natural mold killer and will help break down the mold on the caulk.
- Using a spray bottle or sponge, evenly apply the vinegar and water mixture to the affected areas. Make sure to saturate the moldy caulk completely.
- Leave the vinegar solution on the caulk for approximately 30 minutes to an hour. This will give enough time for the vinegar to penetrate and kill the mold.
- Scrub the moldy caulk with a soft-bristled brush or an old toothbrush. Use gentle circular motions to remove the mold effectively without damaging the caulk.
- Rinse the cleaned caulk with clean water to remove any leftover vinegar solution and residual mold.
- Wipe down the shower caulk with a clean, dry cloth to remove excess moisture and ensure the area is dry to prevent future mold growth.
- Inspect the caulked area for any remaining mold spots. If necessary, repeat the cleaning process starting from step 2 until all traces of mold are eliminated.
Preventive Measures For Future Mold Growth
Mold growth in shower caulk is not only unsightly but also a potential health hazard. Thankfully, there are several preventive measures you can take to keep your shower caulk mold-free and maintain a clean and healthy bathroom environment. By implementing these effective caulk maintenance tips and using recommended preventive products, you can significantly reduce the chances of mold reappearing in your shower.
Effective Caulk Maintenance Tips
- Clean your shower regularly: Using a mold and mildew cleaner, wipe down your shower walls and caulk regularly. This helps remove any existing mold spores and prevents them from spreading and growing.
- Keep the shower area dry: After each use, make sure to dry the shower walls and caulk using a squeegee or towel. Excess moisture provides an ideal breeding ground for mold, so keeping the area dry is crucial.
- Improve ventilation: Ensure sufficient air circulation in your bathroom by using an exhaust fan or opening a window. Good ventilation helps reduce humidity and prevents mold growth.
- Repair cracks and gaps: Inspect your shower caulk regularly for any cracks or gaps. These openings can allow moisture to seep in and promote mold development. Seal any damaged areas with caulk to maintain a waterproof barrier.
- Avoid using harsh cleaners: While it’s important to clean your shower, avoid using harsh chemicals that can damage the caulk. Opt for mild, non-abrasive cleaners that are effective against mold and gentle on the caulk.
Recommended Preventive Products
Choosing the right preventive products can go a long way in keeping mold at bay. Look for:
- Mold and mildew-resistant caulk: Invest in caulk specifically designed to resist mold and mildew. These caulks contain additives that inhibit mold growth, providing long-lasting protection for your shower.
- Caulk sealant: Applying a caulk sealant over your newly installed or repaired caulk provides an additional layer of protection. This sealant helps create a waterproof barrier and prevents moisture from reaching the caulk.
- Silicone caulking tool: Using a silicone caulking tool can help ensure a smooth and even application of caulk. This tool makes it easier to fill gaps and cracks, helping to create a tight seal that keeps moisture out.
When it comes to preventing mold growth in your shower caulk, proactive maintenance and the right preventive products are key. By following these effective caulk maintenance tips and investing in recommended products, you can say goodbye to mold and enjoy a clean and healthy shower experience.

Credit: m.youtube.com

Credit: nwmaids.com
Frequently Asked Questions Of How To Clean Mold Off Shower Caulk
How Does Mold Grow On Shower Caulk?
Mold grows on shower caulk due to the high moisture and warmth in the bathroom. When the caulk is not properly sealed or cleaned regularly, it creates an ideal environment for mold spores to thrive and grow.
What Are The Dangers Of Mold On Shower Caulk?
Mold on shower caulk can pose several dangers to your health. Inhaling mold spores can cause respiratory problems, allergies, and even lung infections. Additionally, mold can deteriorate the caulk and cause damage to the surrounding tiles or wall.
How Can I Remove Mold From Shower Caulk?
To remove mold from shower caulk, mix equal parts of bleach and water in a spray bottle. Spray the affected area and let it sit for a few minutes. Then, scrub the caulk with a brush or sponge to remove the mold.
Rinse thoroughly and dry the area.
How Often Should I Clean My Shower Caulk To Prevent Mold?
It is recommended to clean your shower caulk at least once a month to prevent mold growth. Regular cleaning helps remove any moisture or soap residue that can contribute to mold formation. Additionally, ensure the caulk is properly sealed to prevent water penetration.
Conclusion
Cleaning mold off shower caulk is critical for maintaining a clean and healthy bathroom. By following the outlined steps and using natural cleaning solutions, you can effectively remove mold and prevent its return. Regular maintenance and ventilation are key to keeping your shower clean and mold-free.
Your efforts will lead to a fresh and inviting bathroom space for you and your family.