How to Clean Kitchen Floor Vinyl: Easy Tips for Spotless Shine
To clean kitchen floor vinyl, start by sweeping or vacuuming the floor to remove loose dirt and debris, then mop the floor using a mixture of warm water and mild detergent. Gently scrub any stubborn stains with a soft brush, rinse with clean water, and dry the floor thoroughly.
:max_bytes(150000):strip_icc()/woman-vacuuming-getty-0620-2e32996941da4b8591954b0e988805d6.jpg)
Credit: www.marthastewart.com
Choosing The Right Cleaning Supplies
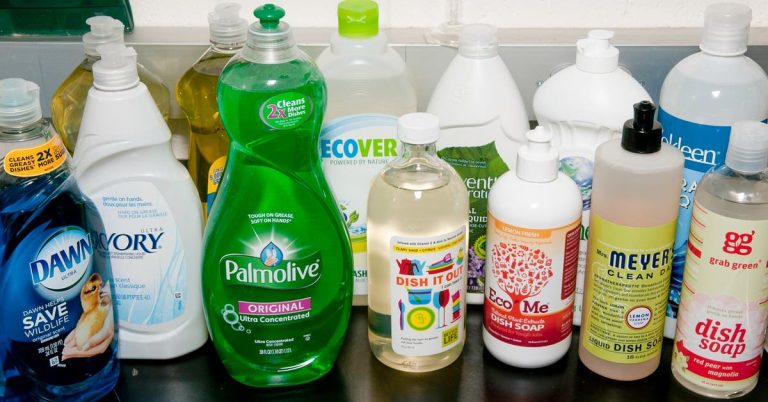
To effectively clean a kitchen floor vinyl, it’s important to choose the right cleaning supplies. Use a gentle cleaner suitable for vinyl flooring and a soft mop or cloth to avoid damaging the surface. Avoid harsh chemicals and abrasives to maintain the floor’s quality and shine.
Selecting The Appropriate Cleaner
When it comes to cleaning your kitchen floor vinyl, choosing the right cleaning supplies is essential. Using the wrong products can damage the vinyl surface and reduce its longevity. Therefore, it is crucial to select an appropriate cleaner that is safe and effective. Here are a few factors to consider when selecting your cleaning solution:1. Check the manufacturer’s recommendations
Start by checking the manufacturer’s recommendations for cleaning your specific type of vinyl flooring. They often provide guidelines on which cleaning products work best and which ones to avoid. Following these recommendations ensures that you are using a cleaner that is suitable for your vinyl floor.2. Look for a pH-balanced cleaner
Opt for a pH-balanced cleaner that is specifically formulated for vinyl floors. Vinyl floorings typically require a mild cleaner with a neutral pH, ranging from 6 to 8. This pH balance ensures the cleaner will effectively remove dirt and grime without causing any damage to the flooring’s surface.3. Avoid harsh chemicals
Stay away from harsh chemicals like bleach, ammonia, and abrasive cleaners. These products can discolor or strip away the protective layer on your vinyl flooring. Instead, choose a cleaner that is gentle yet effective in removing stains and maintaining the luster of your kitchen floor.4. Consider eco-friendly options
If you prefer environmentally friendly options, look for cleaners labeled as “eco-friendly” or “green.” These cleaners use natural and biodegradable ingredients that are safe for both your vinyl floor and the environment. They are also often free from harmful toxins and chemicals.Gathering The Necessary Tools
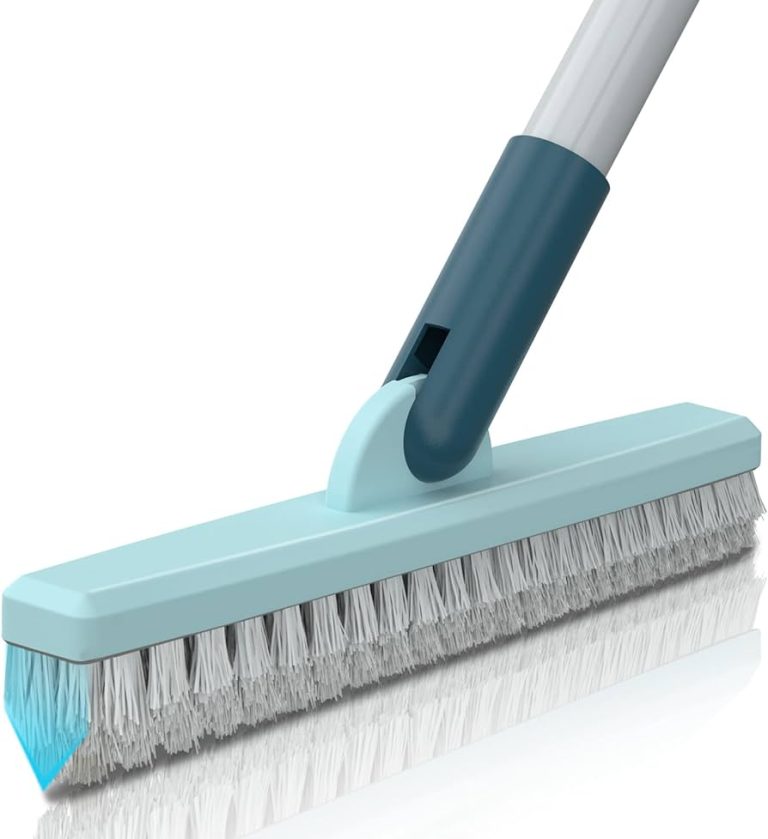
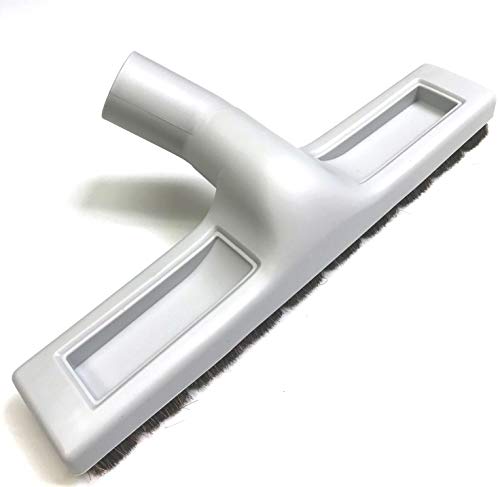
In addition to choosing the right cleaner, gathering the necessary tools for the cleaning process is essential to achieve effective results. Having the right tools ensures that you can thoroughly clean your kitchen floor vinyl without causing any damage. Here are the tools you will need: 1. Broom or vacuum cleaner: Use a broom or vacuum cleaner with a soft brush attachment to remove loose dirt and debris from the floor. This step prevents scratches during the cleaning process. 2. Microfiber mop or soft cloth: Opt for a microfiber mop or a soft cloth for cleaning your vinyl flooring. These materials are gentle on the surface and effectively remove dirt and grime without leaving behind streaks or residue. 3. Bucket: Fill a bucket with warm water and your chosen vinyl floor cleaner. It should be large enough to accommodate your mop or cloth. 4. Mop or cloth wringer: If using a mop, ensure it has a wringer mechanism to remove excess water. This helps prevent excessive moisture from seeping into the floor seams. 5. Protective gloves: It’s advisable to wear protective gloves while working with cleaning solutions to protect your hands from any potential irritants. Remember to always follow the manufacturer’s instructions for both the cleaner and tools you choose. With the right cleaning supplies and tools, you’ll be well-equipped to keep your kitchen floor vinyl clean and looking its best.
Credit: www.amazon.com
Preparation For Cleaning
Get your kitchen floor vinyl sparkling clean with these easy preparation steps. Remove any furniture or rugs, sweep the floor to remove loose debris, and mix a cleaning solution of warm water and gentle soap.
Preparing your kitchen floor vinyl for cleaning is an important step to ensure that you achieve satisfactory results. The preparation process involves clearing the area, sweeping or vacuuming the floor, and gathering the necessary supplies. By following these steps, you can effectively clean your kitchen floor vinyl and maintain its appearance and durability.Clearing The Area:
To begin the cleaning process, it is essential to clear the area of any obstacles or furniture that may hinder your progress. This will allow you to have a clear space to work and ensure that you don’t miss any spots on the floor.Sweeping Or Vacuuming The Floor:
Once the area is cleared, it’s time to sweep or vacuum the floor to remove loose dirt, debris, and crumbs. This step is crucial as it will prevent the dirt from being spread around or scratching the floor during the cleaning process.- Start by removing large debris and food particles using a broom or dustpan.
- Next, use a vacuum cleaner with a soft brush attachment to gently remove smaller particles of dirt and dust.
- Make sure to vacuum the corners and edges of the floor as well, as these areas tend to accumulate more dirt.
Gathering The Necessary Supplies:
Before you begin cleaning your kitchen floor vinyl, make sure you have all the necessary supplies at hand. This will save you time and allow you to complete the task without interruptions. Here’s a list of items you might need:| Supplies | Description |
| Mild detergent | A gentle, pH-neutral cleaner specifically designed for vinyl floors. |
| Mop or microfiber cloth | An absorbent material that won’t damage or scratch the vinyl surface. |
| Bucket | A container to hold the cleaning solution and water. |
| Warm water | Used to create a cleaning solution and rinse the floor. |
Effective Cleaning Techniques
Cleaning the kitchen floor vinyl requires effective techniques to ensure a spotless and hygienic environment. With the right methods and products, you can maintain the quality and appearance of your vinyl floor. Here are the essential techniques for cleaning kitchen floor vinyl:
Mopping With The Proper Solution
Prepare a solution of warm water and mild dish soap. Use a soft-bristled broom to sweep away loose dirt and debris before mopping. Then, dampen a microfiber mop in the cleaning solution and gently mop the entire vinyl floor. Always ensure to use a damp mop, not a soaking wet one, as excess water can damage the vinyl. Once done, allow the floor to air dry or use a soft, dry cloth to remove any excess moisture.
Addressing Stubborn Stains
For stubborn stains on the vinyl floor, it’s essential to use the right cleaning agents. Prepare a paste of baking soda and water, apply it to the stain, and leave it for a few minutes. Then, gently scrub the affected area with a soft-bristled brush. Afterward, rinse the area with plain water and dry thoroughly. Avoid using abrasive scrubbers or harsh chemicals, as they can damage the vinyl surface.

Credit: www.amazon.com
Post-cleaning Maintenance
One of the key aspects of maintaining the cleanliness and appearance of a vinyl kitchen floor is to follow proper post-cleaning maintenance. After you have thoroughly cleaned your kitchen floor vinyl, there are a few additional steps you can take to ensure its longevity and keep it looking its best. In this section, we will discuss two important aspects of post-cleaning maintenance for your kitchen floor vinyl: Drying the Floor and Applying Protective Coating (Optional).
Drying The Floor
After you have finished cleaning your kitchen floor vinyl, it is crucial to allow it to dry thoroughly. This helps prevent any moisture from seeping into the floor or getting trapped, which can lead to mold or other damage over time. Here’s how you can effectively dry your kitchen floor:
- Use a clean mop or a dry cloth to soak up any excess water or cleaning solution on the floor.
- Open windows or turn on fans to improve air circulation and facilitate faster drying.
- Ensure that no family members or pets walk or step on the freshly cleaned floor until it is completely dry.
Applying Protective Coating (optional)
While not essential, applying a protective coating to your kitchen floor vinyl can provide an extra layer of durability and shine, helping to keep it looking good for longer periods. Here’s how you can apply a protective coating to your kitchen floor:
- Ensure your floor is completely dry before applying any protective coating.
- Choose a vinyl floor sealant or wax that is suitable for your specific type and finish of vinyl flooring.
- Read and follow the instructions on the sealant or wax product carefully.
- Apply the sealant or wax using a clean mop or applicator, following the recommended application method.
- Allow the protective coating to dry and cure as per the manufacturer’s instructions before allowing foot traffic on the floor.
Keep in mind that applying a protective coating is optional, and not all vinyl floor types require it. If you are unsure whether your kitchen floor vinyl can benefit from a protective coating, consult the manufacturer’s recommendations or seek professional advice.
Ensuring Safety Measures
Vinyl floors in the kitchen can be kept clean and safe by following these steps: sweep or vacuum the floor, use warm water and gentle cleaning agents, wipe up spills immediately, avoid abrasive cleaners, mop the floor regularly, and dry the floor thoroughly to prevent slipping.
Keep your kitchen floor vinyl looking its best with these safety measures.
Ensuring Safety Measures Proper Ventilation When cleaning your kitchen floor vinyl, it is essential to prioritize safety measures. One crucial aspect to consider is proper ventilation. Proper ventilation helps to dissipate any strong odors and fumes that may arise from the cleaning process. It ensures that you and your family are not exposed to harmful chemicals or substances. To ensure proper ventilation during the cleaning process: 1. Open windows and doors to allow fresh air to circulate in the kitchen. 2. Turn on fans or exhaust systems to effectively remove any unpleasant odors or fumes from the cleaning agents. 3. If necessary, use additional fans to improve air circulation in the kitchen. Avoiding Hazardous Chemical Mixtures Another vital safety measure when cleaning your kitchen floor vinyl is to avoid hazardous chemical mixtures. Some cleaning agents contain chemicals that can react to one another when mixed, leading to dangerous fumes or even potential explosions. To prevent this, always read the labels of cleaning products thoroughly and follow the instructions provided. Here are some tips to avoid hazardous chemical mixtures: 1. Do not mix different cleaning agents unless specifically instructed to do so. 2. Use one cleaning product at a time and rinse the floor thoroughly before applying another product. 3. Store cleaning products separately and away from heat sources or direct sunlight. Remember, some common examples of hazardous mixtures are: – Mixing bleach with any acidic cleaner, such as vinegar or lemon juice. – Ammonia and bleach should never be mixed, as it can release toxic chlorine gas. In conclusion, when cleaning your kitchen floor vinyl, it is imperative to prioritize safety. Ensure proper ventilation by opening windows, turning on fans, or utilizing exhaust systems. Additionally, avoid hazardous chemical mixtures by carefully reading labels and following instructions. By adhering to these safety measures, you can maintain a hygienic kitchen floor without compromising the well-being of yourself and your family.Frequently Asked Questions For How To Clean Kitchen Floor Vinyl
How Often Should I Clean My Kitchen Floor Vinyl?
It is recommended to clean your kitchen floor vinyl at least once a week to maintain its appearance and hygiene. However, the frequency may vary depending on foot traffic and spills. Regular cleaning will prevent dirt buildup and prolong the lifespan of your vinyl flooring.
What Is The Best Way To Clean Kitchen Floor Vinyl?
To clean kitchen floor vinyl, start by sweeping or vacuuming to remove loose debris. Then, mix a solution of warm water and mild detergent. Use a soft mop or cloth to gently scrub the vinyl, paying attention to any stains or spills.
Rinse with clean water and dry the floor completely to avoid water damage.
Can I Use Bleach To Clean My Kitchen Floor Vinyl?
No, it is not recommended to use bleach on kitchen floor vinyl. Bleach can damage the vinyl and discolor the surface. Instead, opt for a mild detergent or a specialized vinyl floor cleaner. Always follow the manufacturer’s instructions and conduct a patch test in an inconspicuous area before cleaning the entire floor.
Conclusion
Keeping your kitchen floor vinyl clean is crucial for maintaining a hygienic and presentable cooking space. By following the simple steps outlined in this post, you can ensure that your floor remains spotless and free from dirt, stains, and bacteria.
Regular maintenance and the use of safe cleaning products will help extend the life of your vinyl flooring, keeping it looking as good as new for years to come.